Usually, caseSTUDY articles begin with a question, and this one is no different but this time, it was 'me' initiating the query, which is the opposite of how things usually go. You see, a fellow ordered a set of eight DS270DLHV and as a new customer, and with no prior communication, I was curious for what they were destined. None of my business, of course, I was just curious. So as it turned out, he had a new build on his workbench, a Phoenix Models 30cc Strega.
As an aside, having not long ago interchanged emails with another customer, one who had purchased a Phoenix Models 60cc Spitfire, and after he'd sent photos I'd gotten so excited, I purchased one for myself. Color me curious to see this 30cc Strega. This, because a) it's a more convenient size aircraft, for me, and b) I was blown away at the high quality of the Spitfire I'd bought from them (no, I haven't built it yet so I can't tell you how it flies, but with 50+ years of experience under my belt, I can share the construction is 1st class and my customer says his flies like a dream). But I digress.
Anyway, we exchanged a few messages (me and the Strega customer) and what came to light was fascinating because, as he related, 'I produce all of the club's social media content - 100s of clips and reels on YouTube and Facebook.' So naturally, I begged a few photos of his build progress since Strega (a modified P-51 Mustang flown at the Reno Air Races) is one of those aircraft near to my heart. What for? Why this article, of course! Why? It's because I was already thinking of writing up something to help guide the next guy buying one of these Phoenix Models Strega!
So not too surprisingly, he proved to be a man of his word and blessed us with several photos of his Strega build, which I'll share in what follows. Moreover, and as it turns out, he selected the exact servos I would have selected for myself *but* because we have other alternatives, I'll yak a bit about those, too.
All this, on the way to making suggestions for what 'you' may find to be the best servos for your own Phoenix Models Strega build.

First up, let me note how within the propaganda for the aircraft on their website they indicate the servo mounts are cut to 21x42mm, which is a standard-size opening (our servos are 20x40mm so this means there's a skosh of freeplay for mounting the servos, which is perfect).
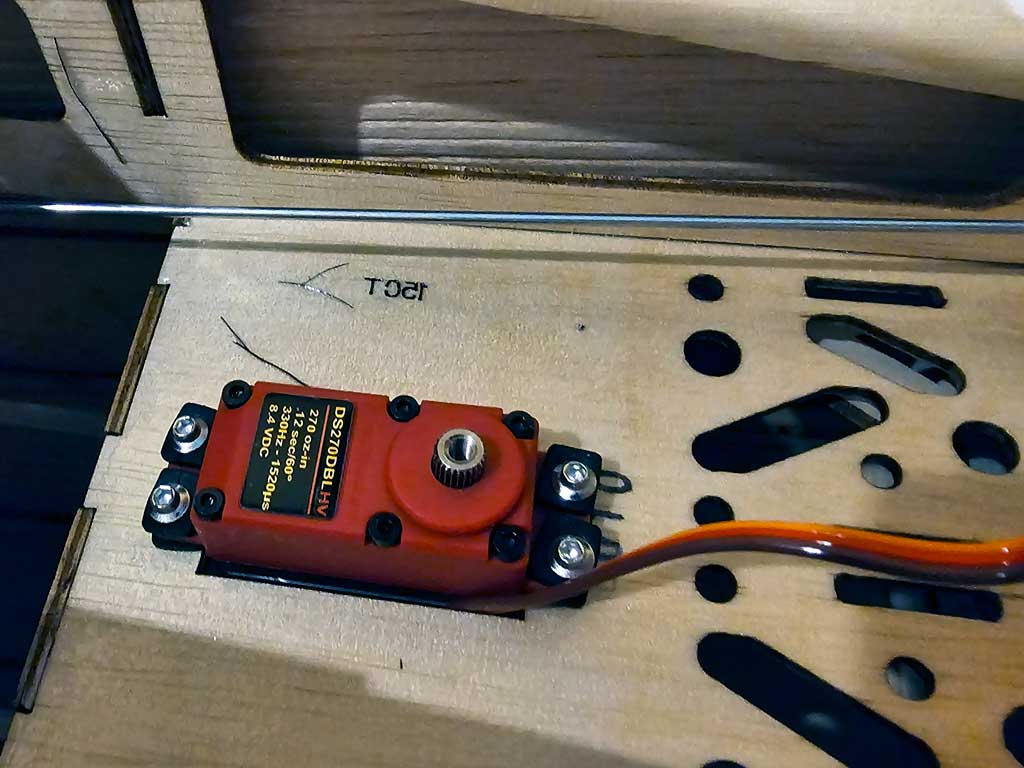
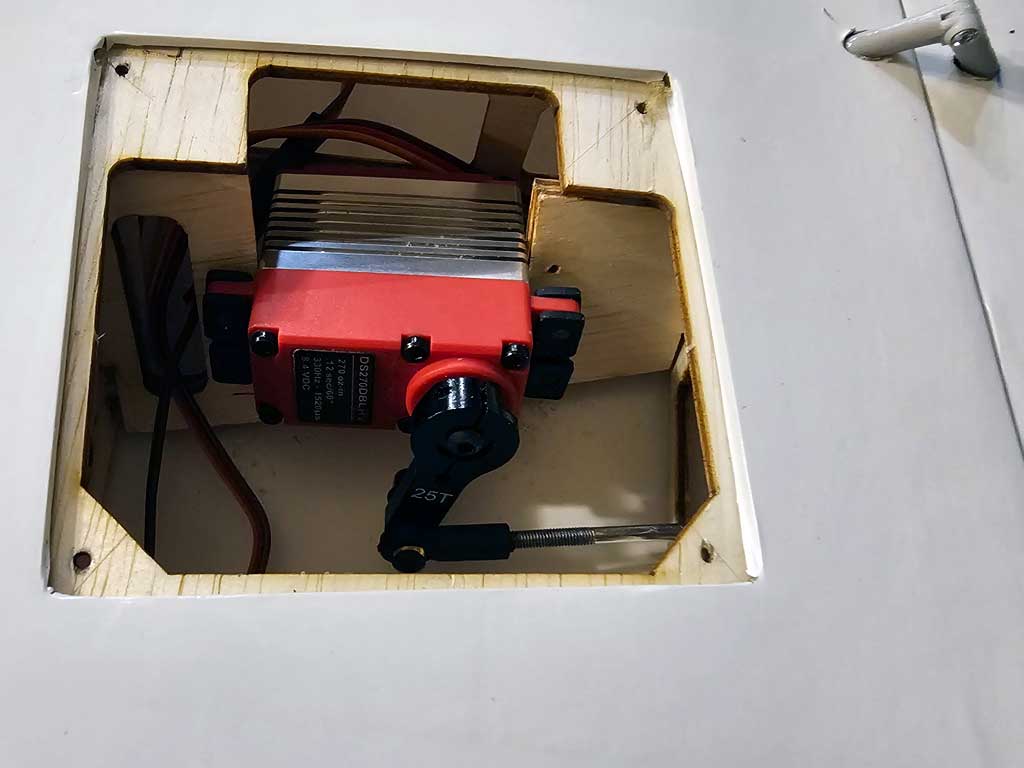
- A DS270DLHV fits the precut plywood tray mount perfectly - this one is for the rudder!
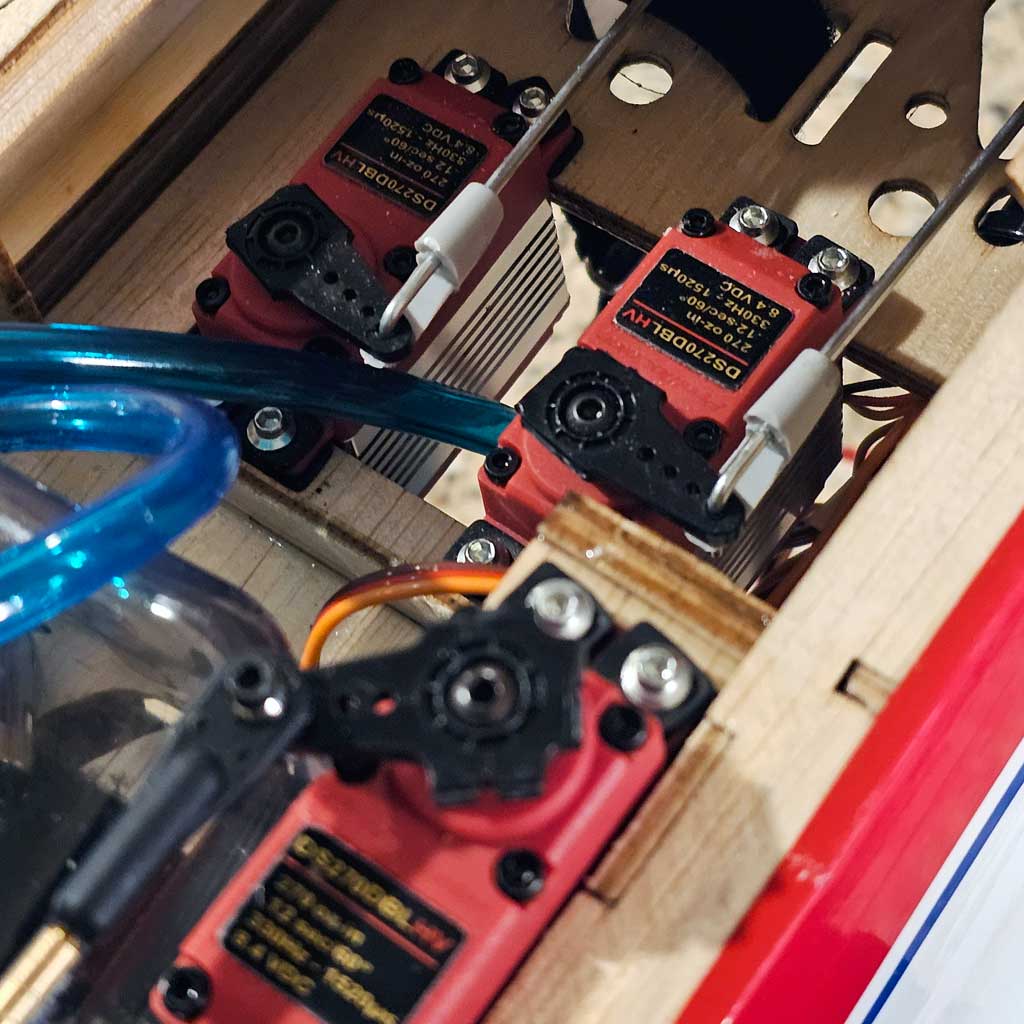
Phoenix Models also state you should use 7 standard hi-torque servos with 2 aileron; 2 flap; 1 elevator; 1 rudder; 1 throttle. Thing is, in my communication with my customer, he said he used two elevator servos, not one. Me? I like this for reasons beyond selling you two servos instead of one because I know only God is perfect and for this reason alone, on this size model and larger, I just sleep better with two elevator servos.
UPDATE 10/25/2023
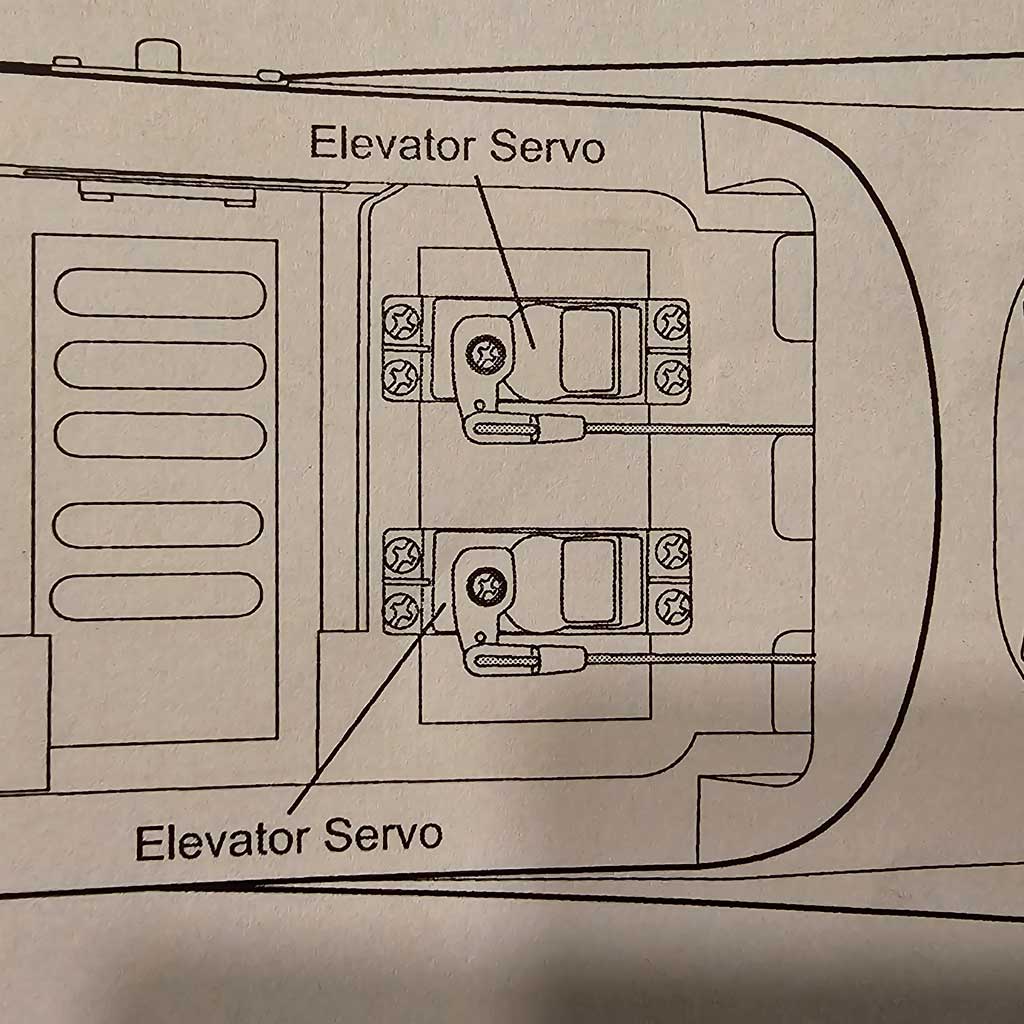
- Seems someone at Phoenix Models sleeps better with 2 elevator servos, too - the latest batch
Anyway, before we proceed, here's a landing approach photo I swiped off their website just because it really gets the juices going . . . is this a beauty, or what? Looks like it's coming in deadstick to me, and it's setup perfectly.
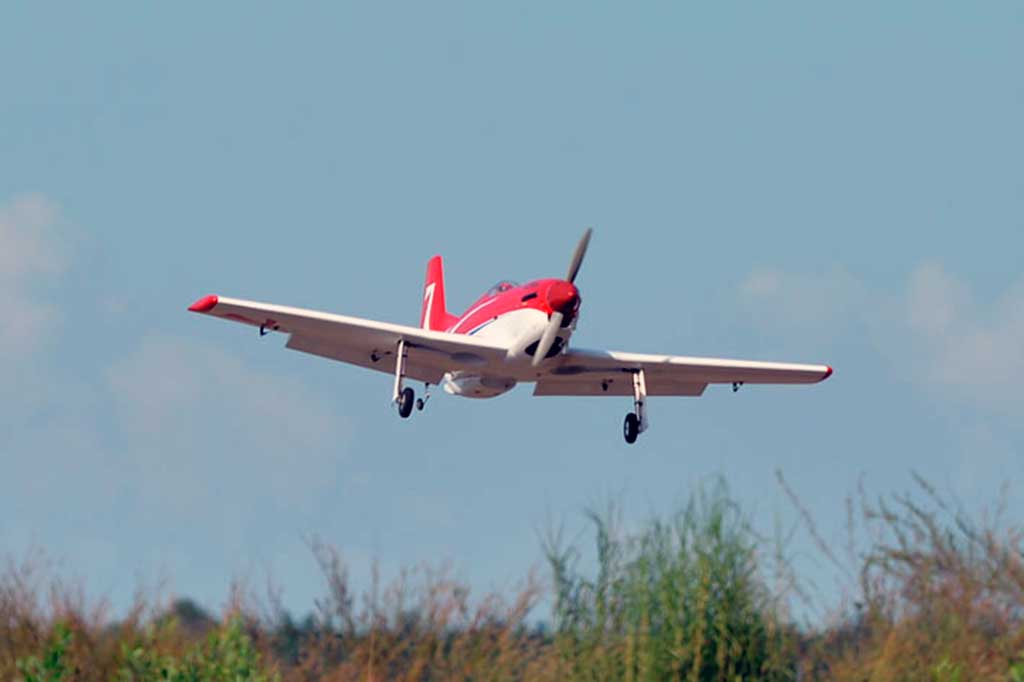
- Caught on landing approach, flaps and gear down, the Strega is a prototypical P-51 Mustang
So this 30cc Strega has a wing area of 1037 square inches, and with a 30-35cc gasser, or a 1.20-150 four stroke will have great performance. And if your buddy gets one also, then racing is a natural consequence!
Anyway, they say expect a weight of 6000g, which works out to 13-1/4lbs but my customer told me . . . flying weight is 15 pounds with nose weight to balance (about 10oz I think). I also swapped the wheels for Dubro no bounce 3.5" they are a little heavier than stock.
What do the numbers say?
Since wing loading for models is typically expressed in ounces per square foot (oz/ft²), we need to do a little converting to figure things out. Begin by first using 15lbs instead of 13-1/4lbs (e.g. the model's weight in the real world) and converting 15lbs to ounces (by multiplying by 16oz/1lb) we get 15lbsx16oz/lb=240oz. Check!
Next, converting 1037 square inches to square feet (by dividing though by 144 square inches per ft²), we get 1037in²/144in²/ft²=7.211ft². And thus, the flying weight my customer experienced was 240oz/7.21ft²=33.28oz/ft², which is about right for this size model to have good handling. Me? I would expect great handling at this weight. And note, my customer used a DLE35 instead of the recommended 30cc engine (and I would do the same because it's modeled on a racer, after all).
So what do we recommend servo-wise? I have three recommendations to help guide you grouped not as good, better, and best because there's no such thing as a ProModeler servo that's made to anything but our highest standard whether it costs $30 or $300. So I'm going to suggest a Sportsman's setup, a Club Racing setup, and a No Holds Barred Racing setup.
The Sportsman's servo setup
It's my opinion this model will fly quite nicely with our DS180DLHV servos on all the flight controls, plus a DS90DLHV on throttle. While my customer used the included servo arms on his build, I'd use our PDRS101 servo arms, instead. These heavy duty glass-filled nylon arms are made using the same material as Glock uses for handgun side-frames, cost less than a buck each in 5-packs, are a tad longer than stock, and stiffer to boot.
Interestingly, and unsolicited, my customer volunteered the same information regarding the DS180 for the flight control servos. Note; he used the same DS270 servo on throttle because, as he put it, I buy stuff for future birds, they all have expirations. So without ever having met the guy, I'd suspect a gray beard, because those are very wise words!
Battery-pack wise I'd probably use a B2S2500 LiIon 2S battery pack. He made his own extensions but only for the aileron servos so I suspect you need a pair of EX20AWG17 extensions (17" long and composed of 20AWG wire). This is how aileron and flap servos are mounted.
- Side mounted and secured to a false rib, you'll appreciate the include Allen drive screws
As for the extension themselves? They're the good stuff, e.g. the thickest wire you can crimp into a Dupont connector, a high strand count, and with that soft and supple silicone jacket (and twisted to resist stray RFI, interference, e.g. if the ignition module begins failing). Customer said getting the flap servo leads into the fuselage didn't require any extensions.
However, you're going to need four more extensions, this time EX20AWG6 coming from the receiver for making the connections from the wing-mounted servos (two ailerons and two flap servos). And you need no extensions for rudder, elevator servos, and throttle.
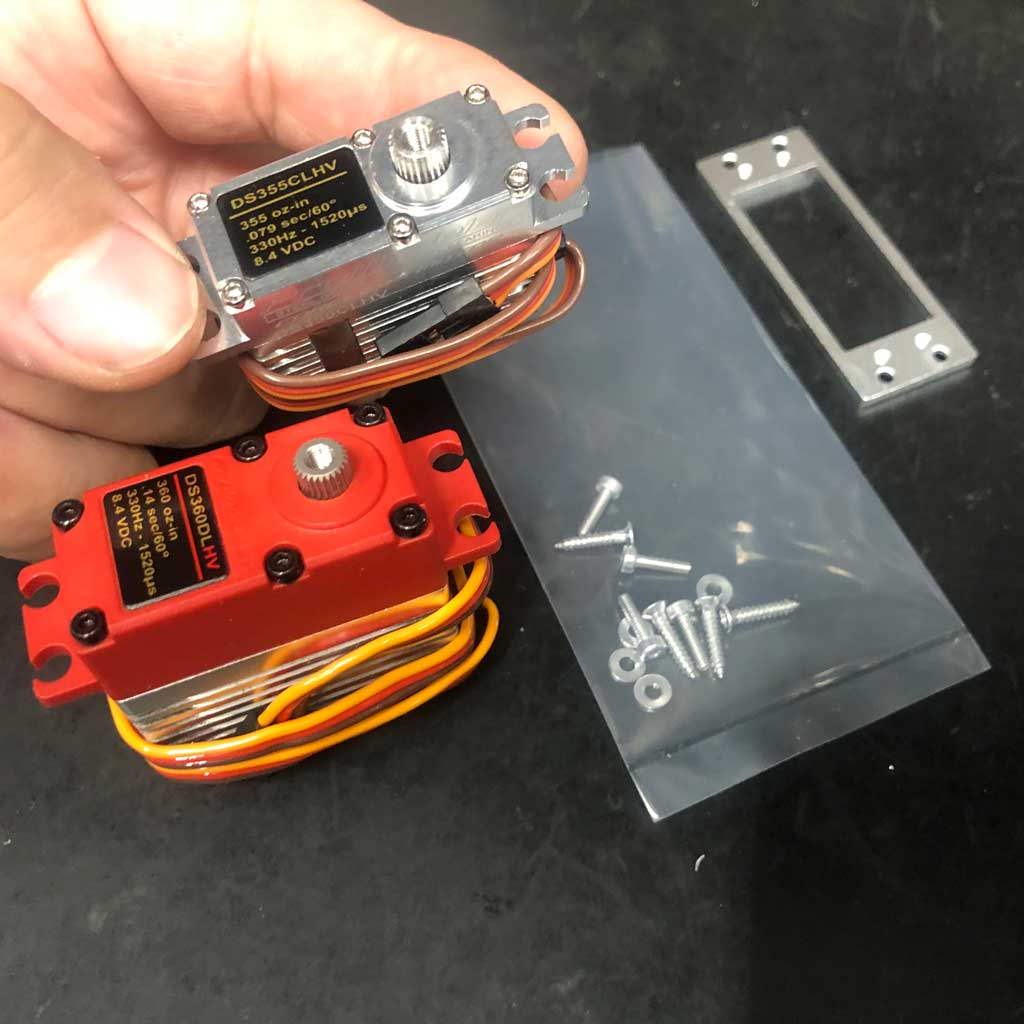
The Club Racing setup
For club racing, substitute seven DS270DLHV servos for the DS180DLHV recommended for the Sportsman's setup. I'd recommend the same DS90DLHV for throttle. And I'll once again recommend the same servo arms, extensions, and battery pack.
What the DS270 brings to the table versus the DS180 (beyond a bit more torque) is a significantly quicker transit speed of 0.12sec/60° versus 0.17sec/60°which is unimportant for sport maneuvers like loops, rolls, stall turns, inverted flight. Where this increased speed is telling is when you're hitting the first pylon and jostling for position. This is when a more rapid response may be the difference between cutting inside your competitor and 2nd place. And you'll notice it with improved snap rolls if you're a fan of this maneuver.
So for both the Sportsman's setup and the Club Racing setup, I'm guiding you toward servos in our DL-series. These are superbly made and expressly priced to not torch your wallet.
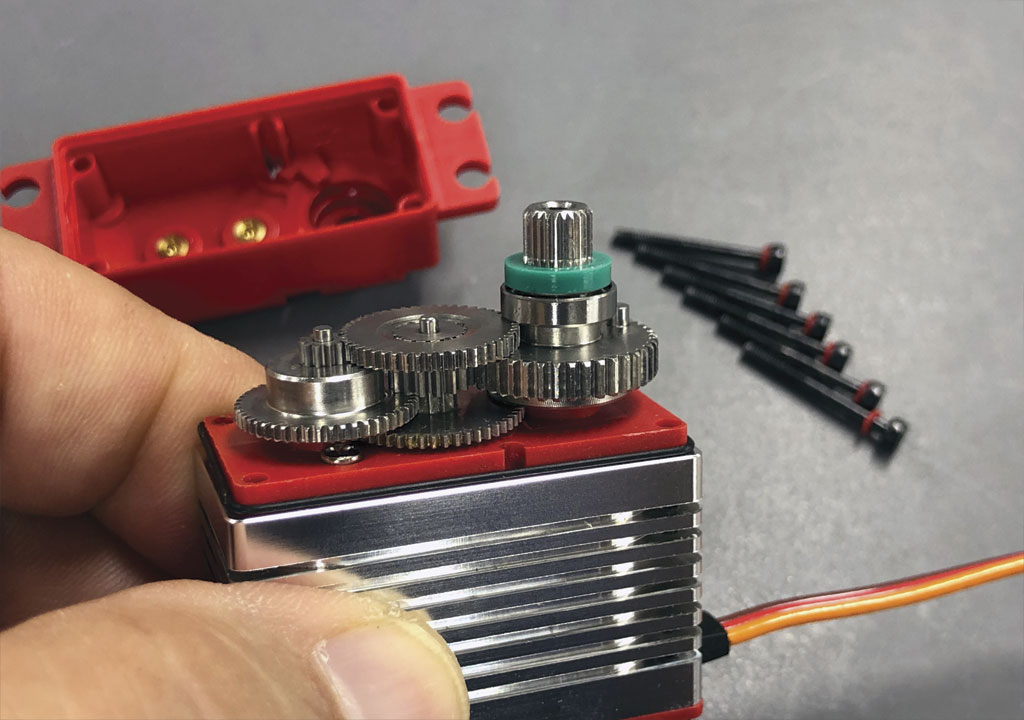
For example, they feature the porcupine center section.

- CNC-milled from Alcoa 6061-T6 aircraft alloy, to include cooling fins
The cooling fins, especially, are a big deal. You don't find them in cheaply made servos. True, even when they're supplied with el cheapo extruded alloy centers because the fins are time consuming to make (we use a 1mm slitting saw). So you get smooth side alloy cases from competitors who are unwilling to go the extra mile and do it right.
Remember, when they say time is money this is the kind of stuff they're talking about because the longer the cycle time to mill a part, the more it costs in both machine time and labor. Labor, especially, because there's a man tending the machine. So cheap servos don't give you cooling fins.
Why is this important? Simple, it's because when a servo is working hard, it gets hot. Nature of the beast. And when we get heat in an electronic device, we want to shed the heat as quickly as possible. So the fins are important to radiate this excess heat away because heat is what kills electronic components.
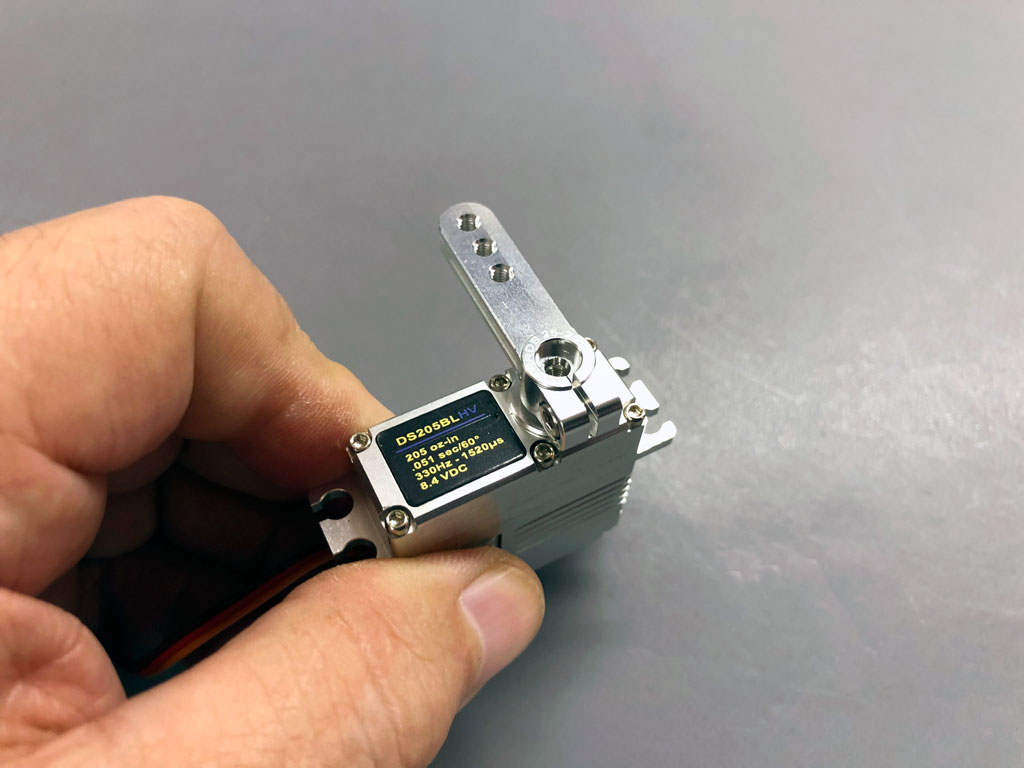
Eyeball these DS270DLHV specs and I'll explain.
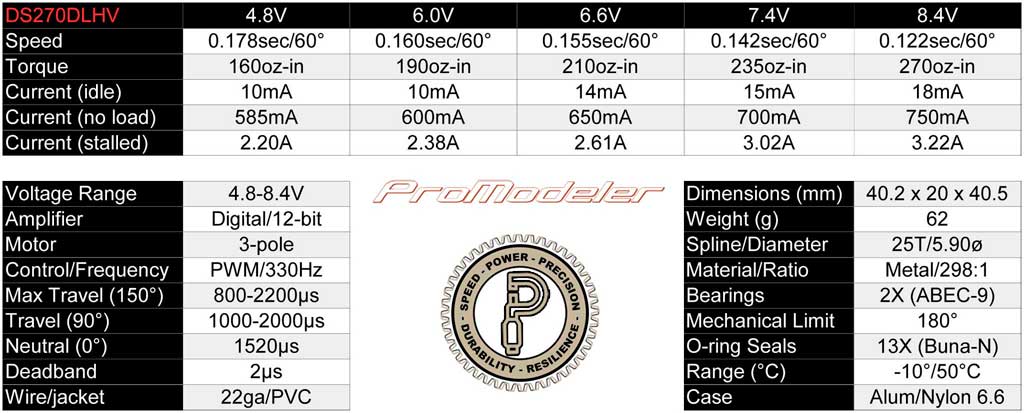
So the question is how much heat are we talking about? Well, if you look at the specs for this class of servo (or similar from competitors), then you see they're 27W devices. How do we know this? Look at the five columns representing voltage. Let's go to the highest,8.4V. Note the worst case amp draw of 3.22A.
The math is simple because we'll use the power formula where W=V*A so plugging in 3.22A at 8.4V and multiplying we figure Watts 8.4Vx3.22A=27W (W is Watts). Tell me, have you ever touched 5W Christmas tree bulb? Burned you, didn't it? So 27W is a lot of heat to get rid of, right?
So your ProModeler servos will last longer under similar conditions versus competing servos just because we do a better job of shedding excess heat. But go back and look closely at the porcupine case photo. Notice the ten machine thread bolts.
It also costs more to drill and tap M2 the alloy center 10X than to extrude an alloy case and use four long ass screws that just slip past holes in the corners the way el cheapo servos are put together. And note, there are also 10 teeny tiny o-rings fitted to these bolts.
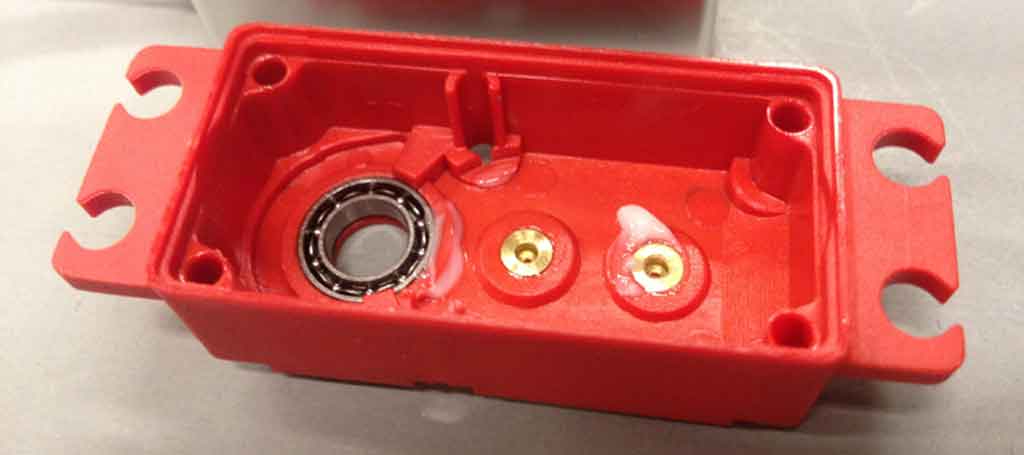
Next up, the potting compound we use.
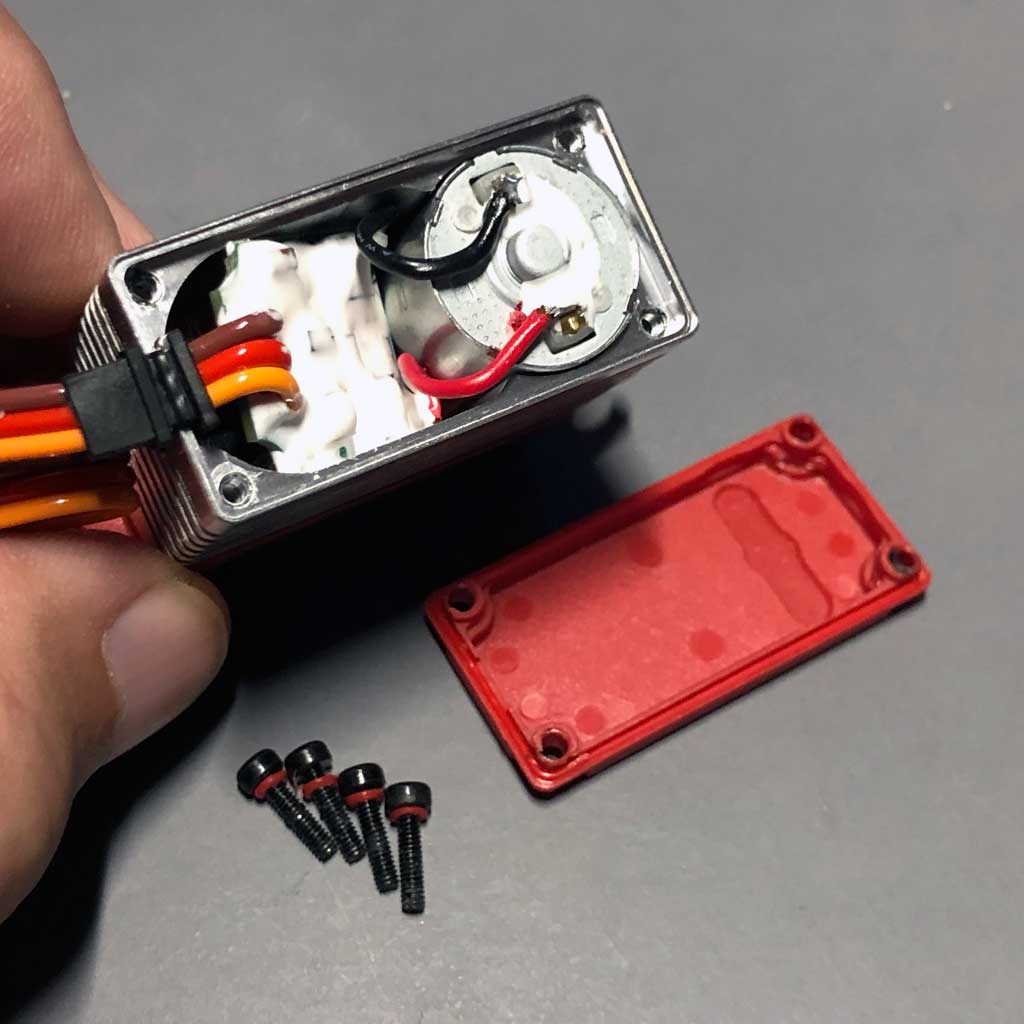
- Potting compound applied to the PCB and the motor leads
The white potting compound (but sometimes we receive black, it doesn't matter) is something we call Monkey Snot. This, because it's a sticky mess and smelly mess to apply to the PCB and motor terminals. But this is a crucial part of the puzzle for one of these great DL-series servos.
You see, part of what makes the ProModeler DL-series better than competitors is that unlike hobby-grade servos, they're built to meet military standards (and subjected to these tests).
MIL-STD-810G-Part 16
- Shock - Test Method 516.6
- Vibration - Test Method 514.6
- Water Intrusion - Test Method 514.5
But there's more, like the gear train. The bull gears are made of 303 stainless and the pinions are made of harder 304 stainless steel. Yes, all metal gears where the metals are stainless steel.
- 303 and 304 stainless steel gears for precision and long lasting life
ProModeler gear trains use the best and most long lasting combinations of stainless steel gear material available for use in servos. Better than titanium, brass, or anything else.
What do you get out of this? A long life span, and great durability, both. This last part is especially important when flying models with single cylinder engines, a.k.a. paint shakers.
Next look closely at the top of the servo case.
- Bronze hardpoints insert molded into the glass-filled nylon case
The little shiny bits of metal? Those are Swiss turned bronze hardpoints. They are insert-molded into the case for the stainless steel gear shafts. What for? To harden the plastic mount and preclude wear from happening as quickly as more cheaply made servos (where the gear shaft pockets are just the plastic). After all, once the round bores go egg-shaped then the tolerances of the gear mesh goes to Hell and wear begins to occur quickly.
No Holds Barred Racing setup
For this setup, our customer is a more radical pilot. Instead of a gasser or a big-bore four-stroke, this fellow is perhaps looking at using a 2-stroke engine. Perhaps one of Dub Jett's 90LX on 30% nitro. For example, I have one that'll turn an 11x8 at over 15,000RPM.
For this screaming setup, lightweight is the key to performance. And with so many servos in the aircraft, servo selection represents an opportunity to put the model on a diet. How? Simple, by using mini-class servos instead of standard-class servos.
A great servo for this application would be our DS355CLHV mini. Weighing in at a mere 44g, this puppy outputs 355oz-in and transits in a blistering 0.077sec/60°. It's both powerful and smoking fast!
These servos plus aluminum M2S mini-2-standard mount adapters and Bob's your uncle when you're going racing!
And lest you think this is overkill, remember the wisdom shared by our customer earlier when he said . . . I buy stuff for future birds, they all have expirations.
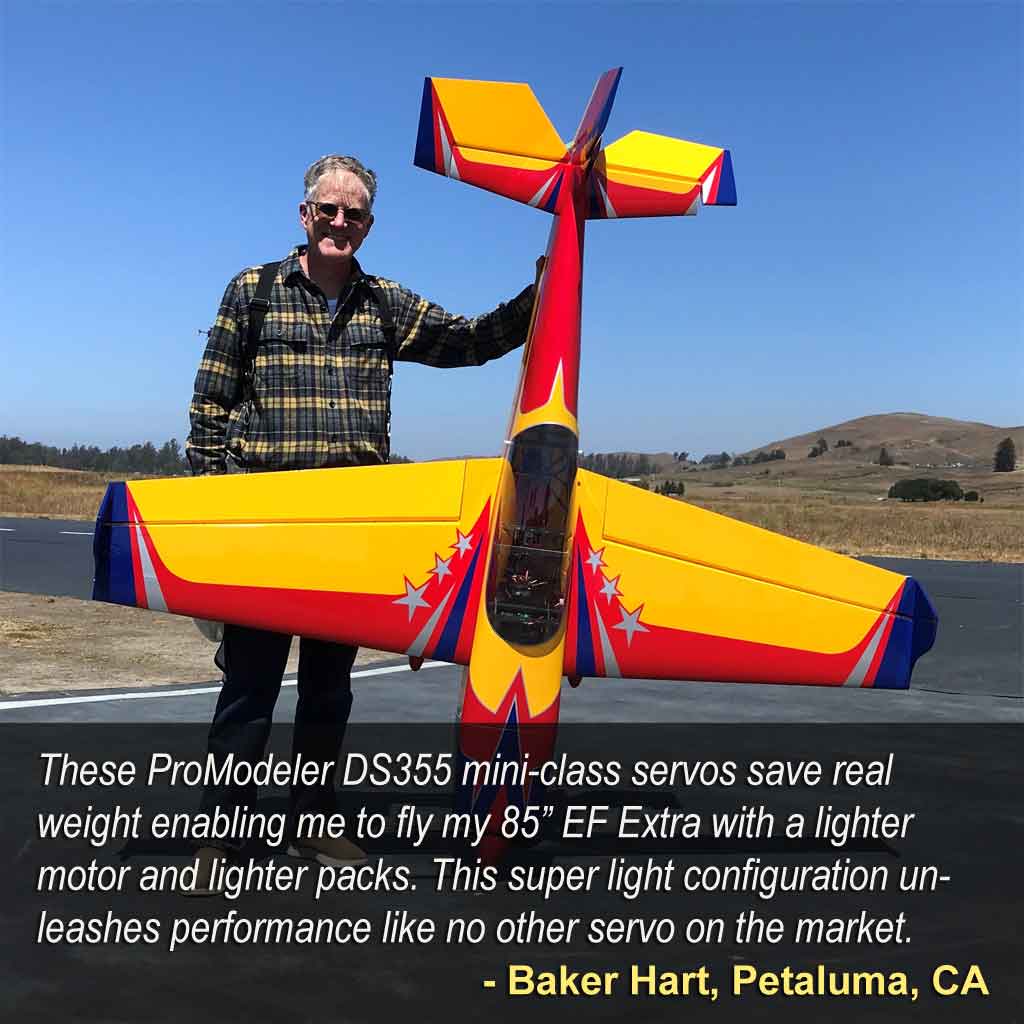
And with that in mind, allow me to share a photo of another customer. This fellow used the DS355CLHV in an application everybody said couldn't be done.
Now the lighter servos are part of the answer, and if you're serious about racing, you also use a smaller battery pack. Why? It's because you'll be racing heats. This means you only need enough capacity to run the race plus two more minutes to land, max!
For this setup, the appropriate battery pack is again a 2S LiIon, but this time, the B2S650 instead of the B2S2500. And servo arm wise, the same heavy duty glass filled nylon as before, the PDRS101.
Or in the alternative, maybe a a pair of PDRS25-25T servo arms for the elevators since you'll be horsing the model around the pylons and the G-forces can be intense.
These are CNC-machined from 7075-T6 aircraft alloy and have an H-beam profile to resist bending and have enough meat to accept a full length screw without double nutting.

Wrapping it up
I've shown you a few different servo set ups in trying to help you decide on the best servos for your Phoenix Models Strega. These being the Sportsman's setup, Club Racing setup, and No Holds Barred Racing setup.
Which is best for you? As always, the answer is . . . it depends.
Any further questions, suggestion for this article, etc. then just reach out to me at 407-302-3361, or via email: info@promodeler.com
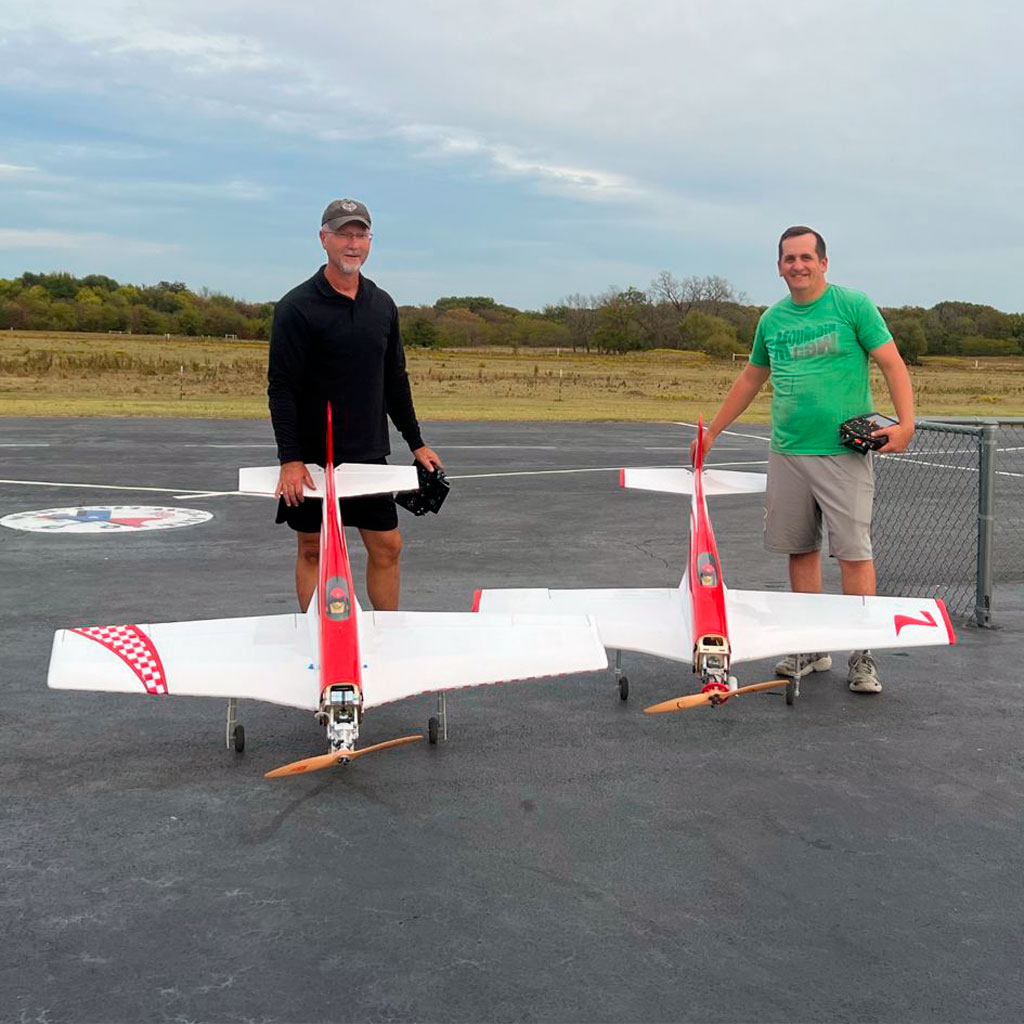
Last thing, the fellow we owe for going to the trouble of taking and sharing installation photos for this article kindly shared this with me . . . and I was right, he's the graybeard on the left. And yes, he and his pal engage in a spot of racing. Yee-haw!