General Information
Q. I was interested in the DS1155BLHV for my X-Maxx and then learned about this monster. Why would I want such a powerful servo for my rig instead, what's the use-case? How do I know which one is best for me?
A. Honestly, we don't know you thus, and can't make the decision of what's the right servo for you, but lets delve into *why* we made the pork belly, because this may help you suss it out for yourself.

Basically we created it because there seem to be two types of X-Maxx/XRT owners. Those who have fun in a gentlemanly manner, running what is reasonably close to stock rig, maybe with a few tuning parts and suspension components, plus maybe upgraded brushless motor and ESC, but basically close to how Traxxas released it.
And then there are those who modify the crap out of the rig (often resulting in them weighing 20lbs, or more) who then engage in varying degrees of hooligan-type behavior with their rigs. It's for the latter, especially for whom we created this servos. Why? It's because these rigs are heavier and faster. This type of rig used this way can still tear up an immensely strong standard class servo, like the DS1155 . . . pretty easily. So it's for them that we created the pork belly because it usually sorts their requirements.
So which one are you? Dunno. Your call.
Note, however, just because we made it for an X-Maxx or XRT, servos don't know in what they're being installed. Point being, while this servo has been created expressly to fit these Traxxas products (to include the Wide Maxx, too), the facts are with the addition of an inexpensive mounting beam option, it can be retrofitted into a wide variety of 1/5th scale rigs. For example, a Losi DBXL-E 2.0.
Funny thing about making this quarter-class servo for the X-MAXX is we're already known for producing the most bad ass standard-size servo available in the form of the DS1155BLHV( below). However, just as it's said you can't be too rich, or too thin, turns out you can't have too much power in an X-MAXX.
Point being, for some (and you know who you are), since the 1155oz-in is still not enough, we tasked the team with doing one better . . . with no restrictions whatsoever. The pork belly is what they came up with!
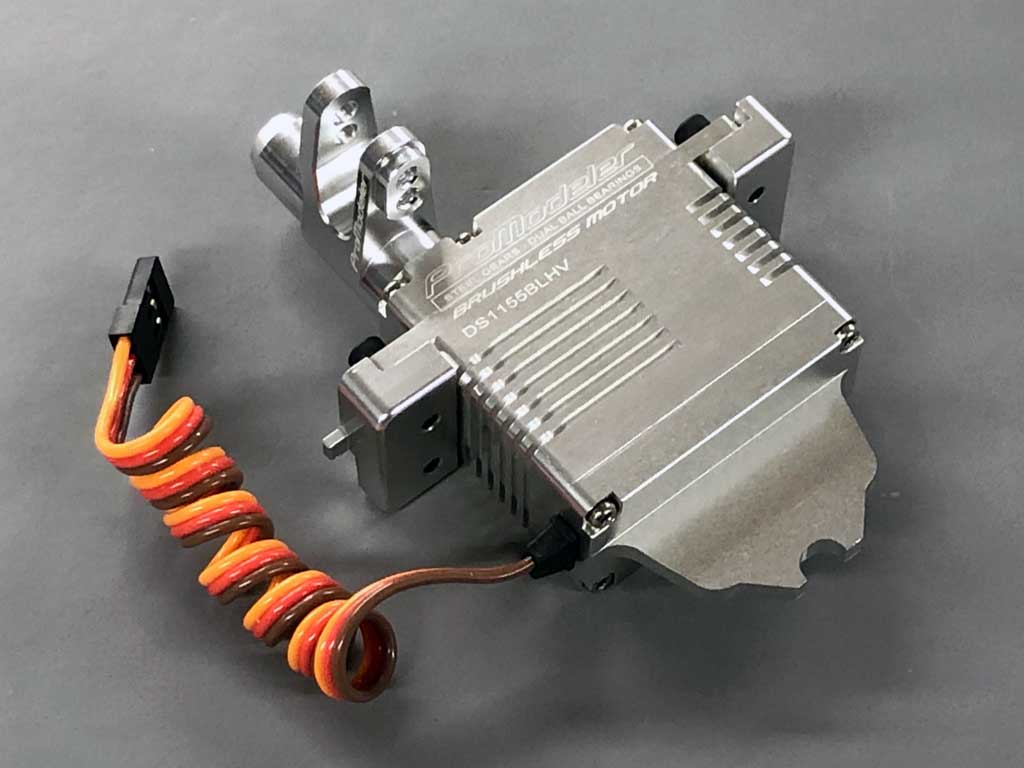
- Our best standard size servo for an X-MAXX, the awesome ProModeler DS1155BLHV

With a background of once fitting a rat into a Chevy Vega, and a remit of making the best possible X-Maxx servo, talk soon turned to how could we possibly shoehorn the mighty 2685 motor into a frame suited for an X-Maxx. Basically, we're talking abut how to fit the humongous brushless servo motor powering our mega-class monster into a servo suited for an X-Maxx. Thing is, that motor is HUGE so there's just no room for it. So with no ready choices, we turned to our motor catalogs and began yakking about our goal with the world's most talented motor-engineers.
Anyway, late one night (because several of us stayed after work keeping an eye on Lady (shop bitch about to lay puppies) and yes, whiskey may have been involved. So as we eyeballed her swollen belly (musing how she looked like a pregnant sow and laying odds for how many she'd pop out), it dawned on us how we 'might' could possibly fit the monster motor into a midi-size frame.
What if we added a belly to the servo case? You know, to make room for the big ass motor . . . same way Lady's swollen belly made room for what turned out to be nine pups!

- Exhausted from popping out her pups, Lady takes a well earned break
So basically, we're talking about CNC-machining a solid billet of 6061-T6 aircraft aluminum, so with no limits beyond a lack of imagination (meaning we can hog any shape that takes our fancy), and because thinking around corners is our forte, thus was born the idea for an asymmetrical powerhouse. One with a belly!
So there you have it, we've created is a servo with a belly, which is custom made to fit the tremendous Traxxas X-MAXX. And it's one fitted with the best motor made. Anyway, this is how we dreamed up a bastard of a servo for the baddest rig in Traxxas' lineup!
Background:
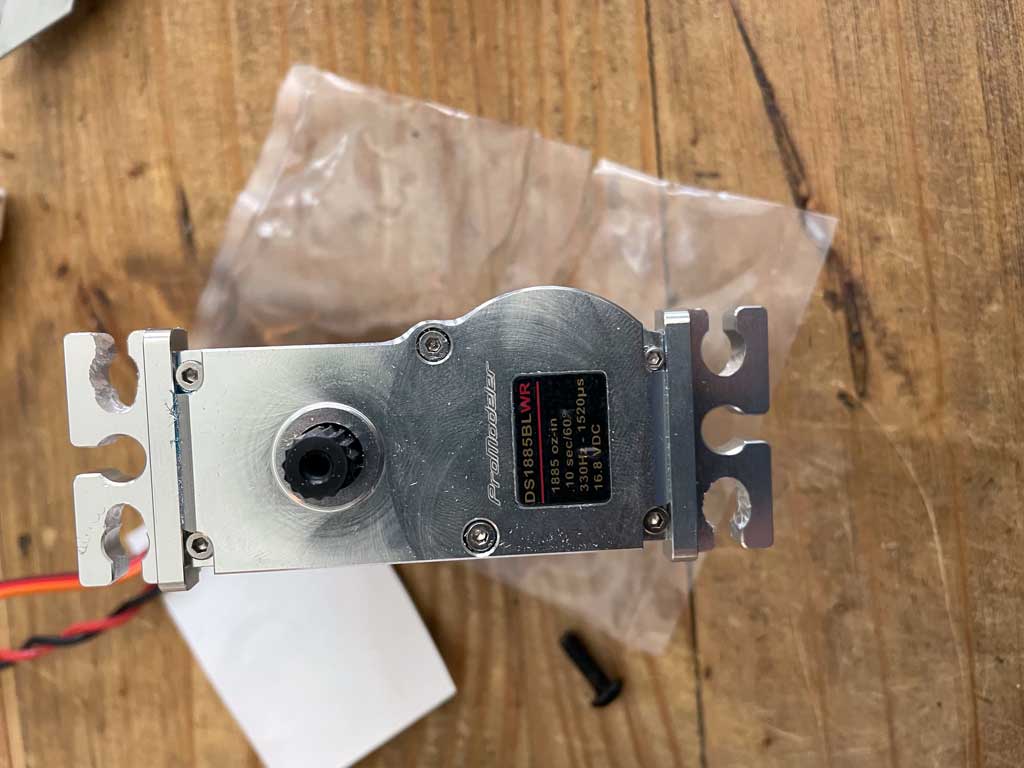
We immediately booted the CAD workstation and sketched some outlines. A rough draft quickly took shape. Next day we butchered an X-Maxx to see how much room we actually had as we began refining the design. In the big 'un we manage to squeeze 2685oz-in out of the motor, but gearing it for sped to better suit the X-Maxx meant producing 1885 oz-in in 0.10sec/60 which is a 'lot' of power delivered fast by any measure (and simply astonishing compared to the stock servo).
From the very start we figured on using steel gears. This, if it were to have 'any' hopes of living. This also meant large steel gear shafts, too. But beyond that, we'd need to reinforce the billet aluminum case - but - the first pass with FEA (finite element analysis) showed a problem with using bronze inserts to reinforce the bore. A second pass using steel quickly sorted that (basically swiping another page from the DS2685BLHV mega's design book). Then inspiration struck and we specced stainless bearings to allow the shafts to rotate as they're loaded.
- Sporting an unmistakable profile, the XX has a bit of a belly - pure power!
Also, and anticipating giant scale aircraft modelers having an interest in this product, we designed accessory beam mounts, too. Dimensionally the same as the mounts for the mega-class DS2685BLHV, this means also fitting this servo into 1/5th scale gas rigs will be a doodle! Anyway, regardless of who else may find a use for this servo, internally, we always referred to this to this servo as the XX because of what top of mind.
Summary:
In short, by using the mega-class motor from our DS2685BLHV, we've come up with an idea for a whole new class of servos. Fitting between standard-size and mega-size, this midi-size servo is our very best for the Traxxas X-MaxxX.
Product Details
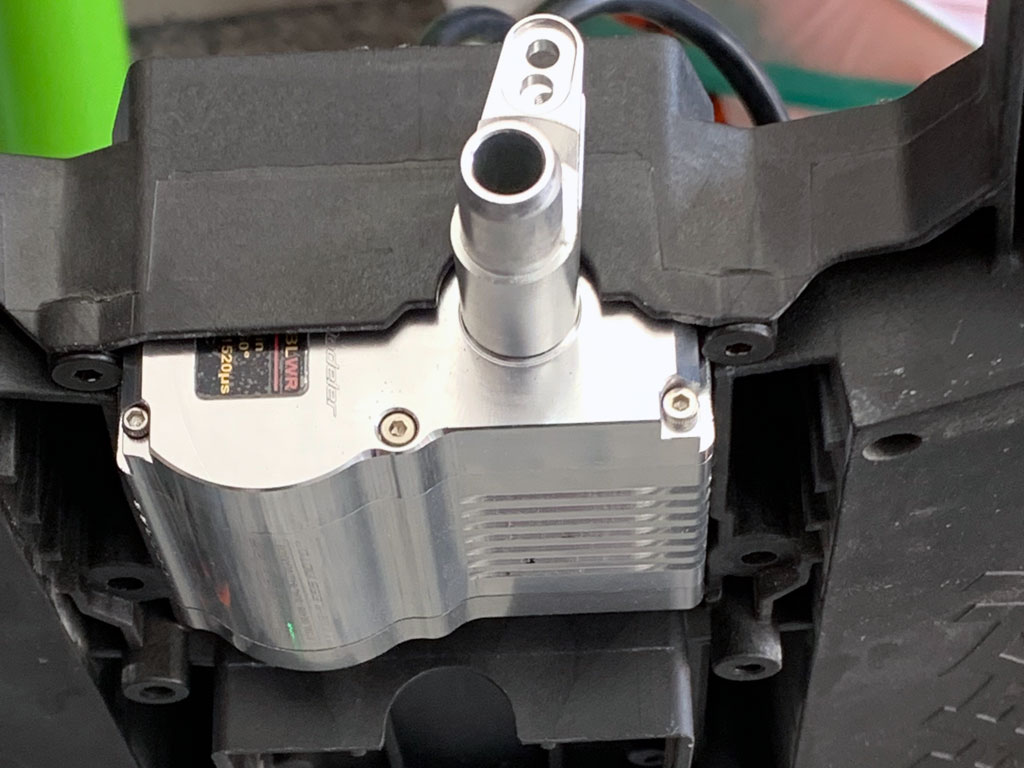
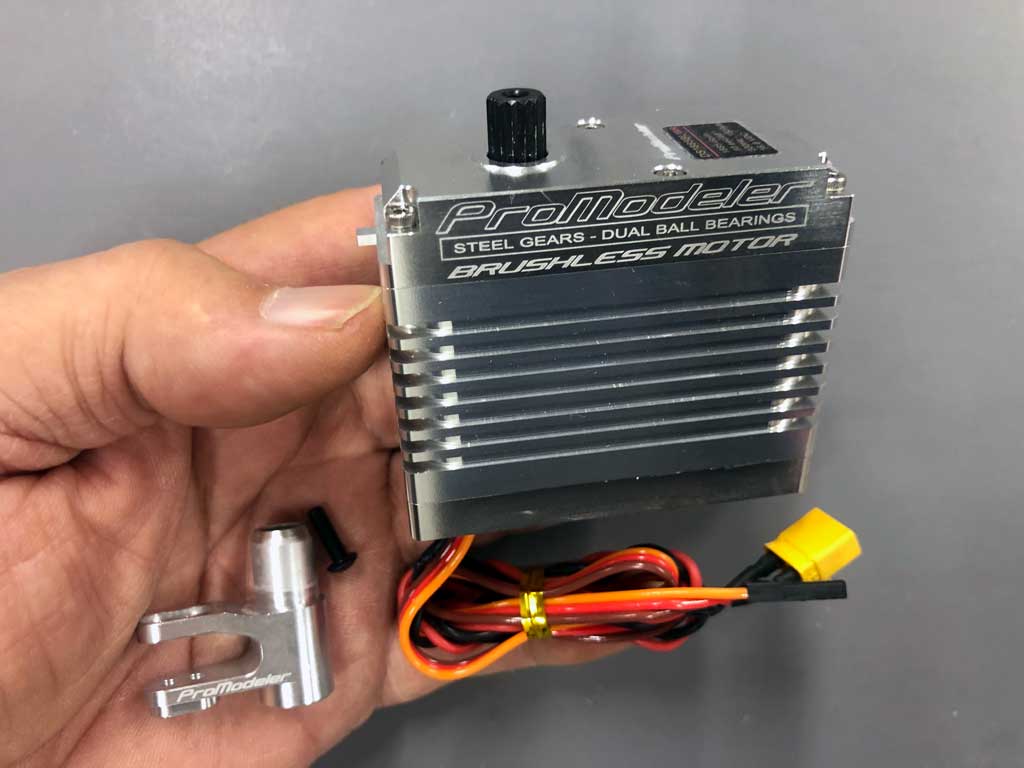
Items of note within this servo obviously include the massive motor out of the DS2685, which is what provides plenty of motive force. Claims the Earth slows down when this servo is deployed are flat out false . . . but it is truly a powerhouse. Note how it dwarfs the motor for the DS1155, quite a difference, eh?
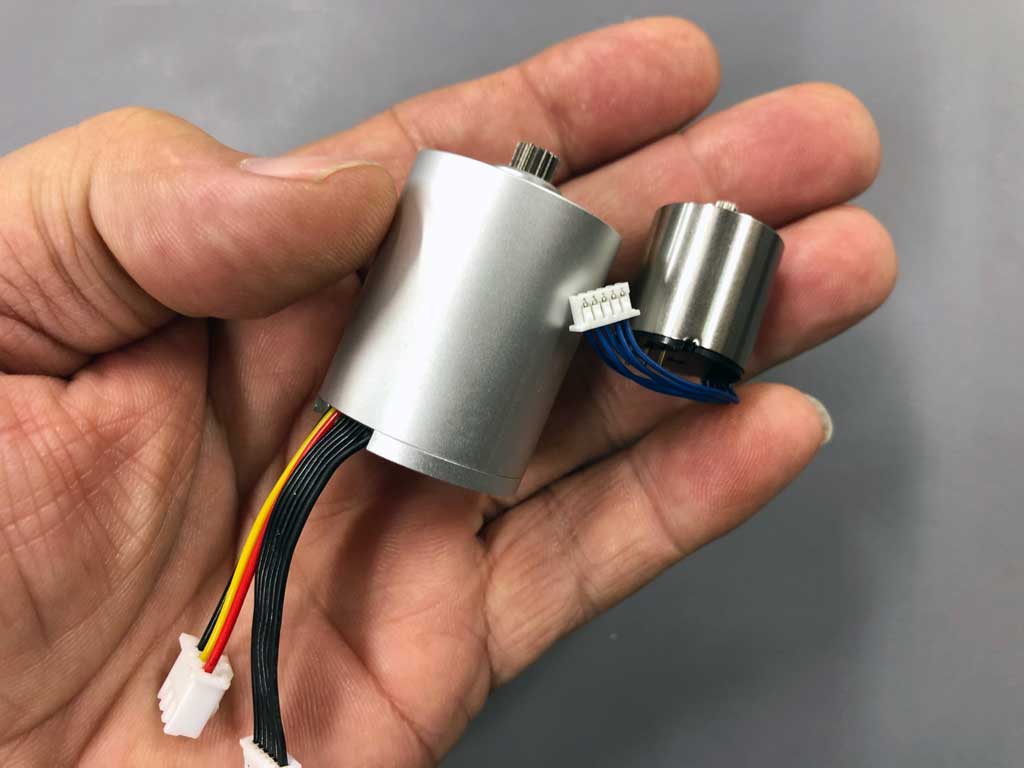
- The exact same motor that powers the DS2685BLHV, but geared for more speed.
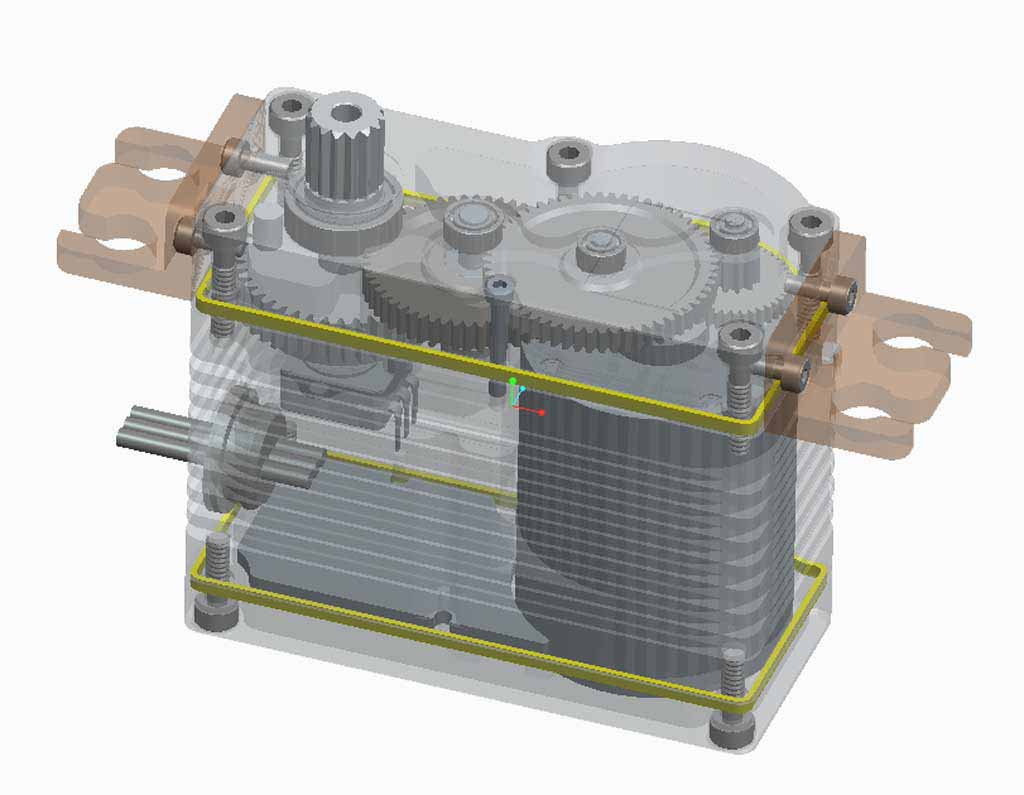
And when we remove the six stainless steel Allen-head machine bolts that anchor the transmission section together with the center case, notice how four of the 6 bolts box in the bearing for the output shaft. This is what ensures stiffness and a tight gear mesh regardless of the forces involved.
Anyway, we figure your eyes are immediately drawn to the massive steel gear train. Note the special high pressure wear coating on the output gear. Also, eyeball how the case is keyed where the assembly bolts thread home to the center-case assembly. Do you see the raised perimeter? This matches bores in the upper case and when these fit home, there's no way this case twists and deflects such that the mesh changes under load. Nope, ain't happening!
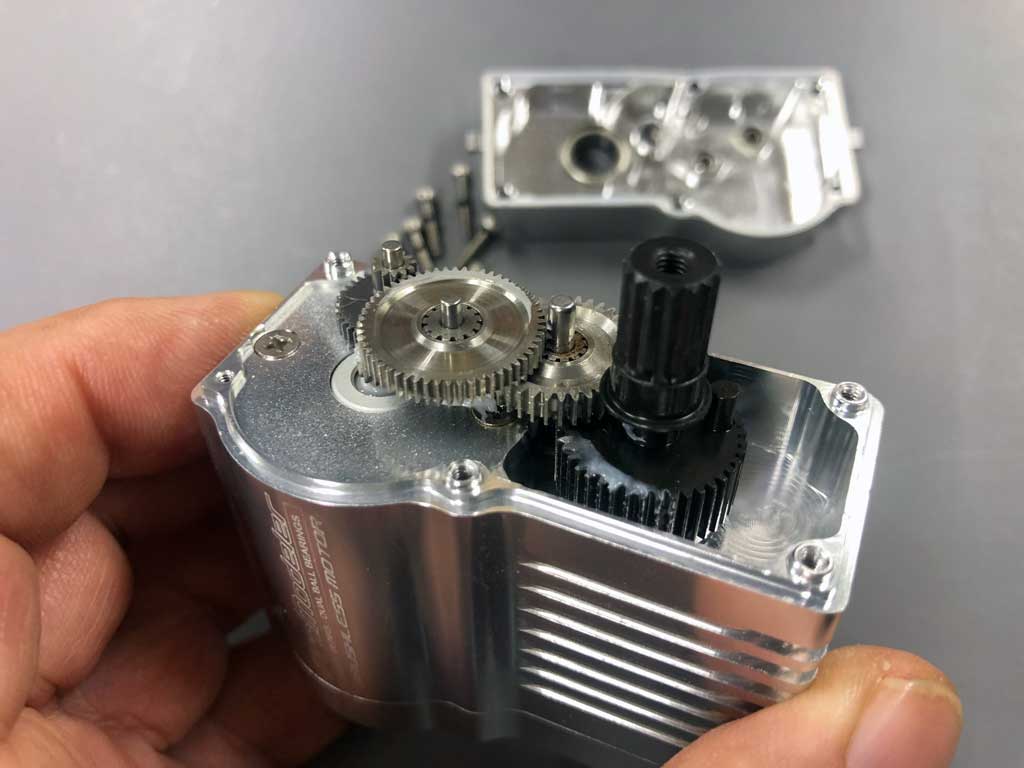
- The center case is the foundation for this massive XX servo
However, the detail we'd especially like to draw to your attention are the hard points. Note the use of stainless steel bearings to float the gear shafts. This ProModeler innovation is designed to help reduce friction and shaft galling due to the extraordinary loads imposed on the structure. The idea is for this puppy to last and last - more like the Energizer bunny!
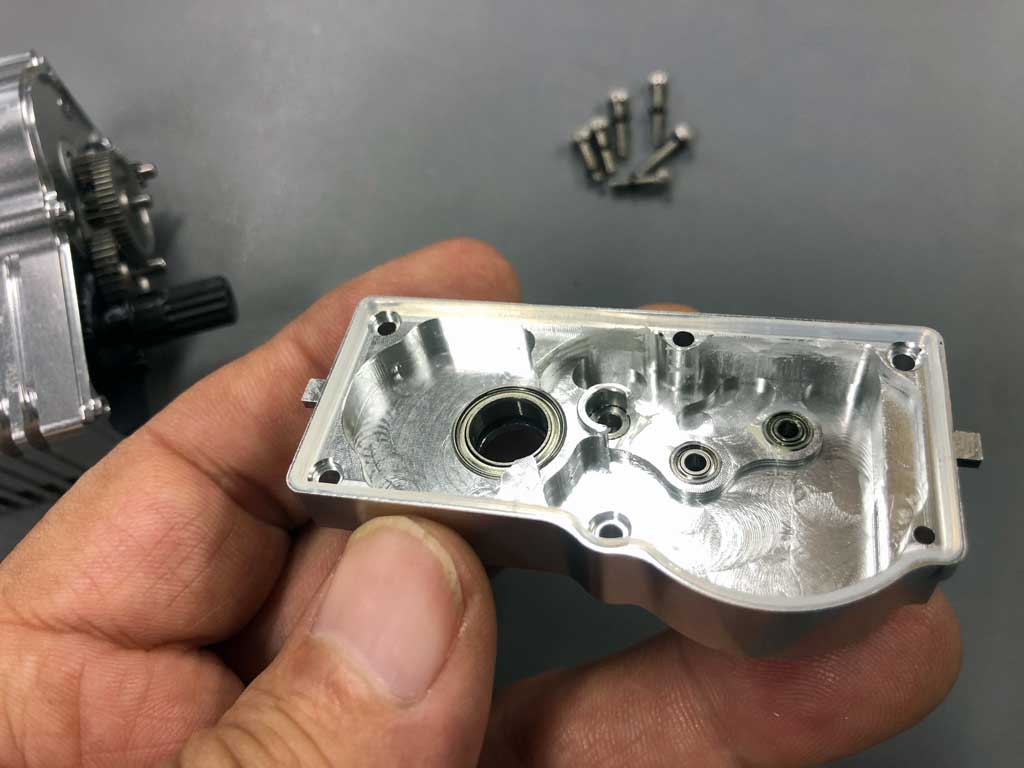
- Note 13 o-rings, custom silicone seals, and ball bearing hard points . . . sweet!
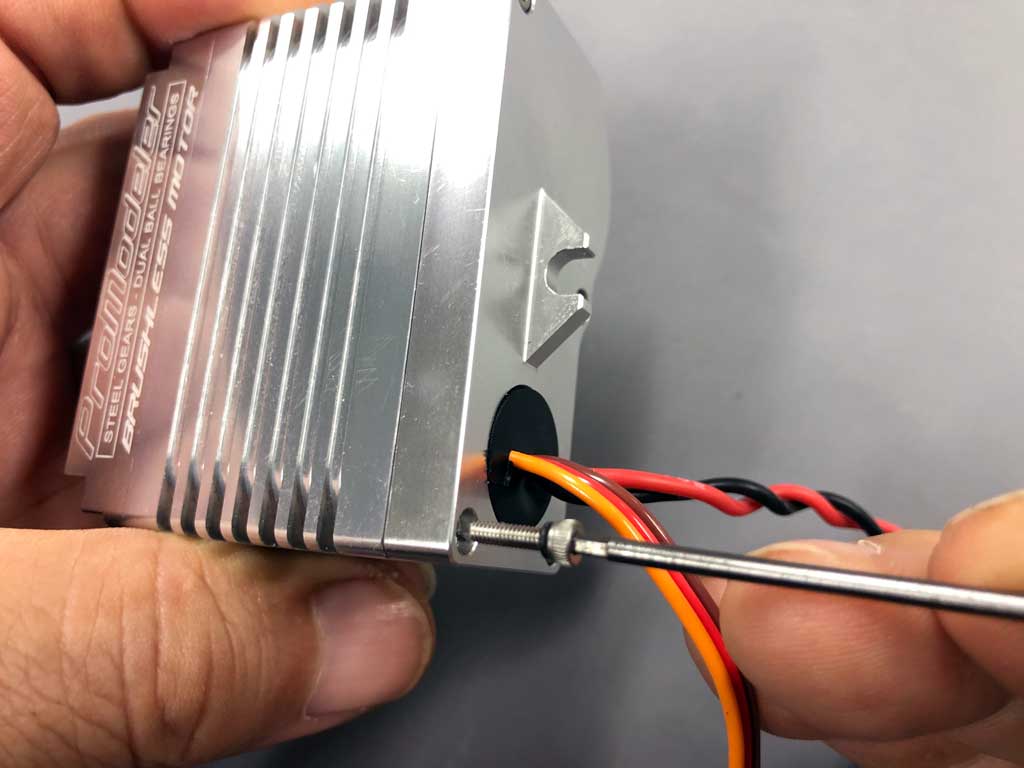
When we take a look at the electronics section we see a PCB tucked away and coated with potting compound. Whether it's black or white doesn't matter. What does is how we use plenty of it on - both the board as well as the neoprene bung where the leads exit the case. We refer to this as monkey snot because ts a smelly sticky mess to apply, but it's totally worth it because this ensures the components on the PCB stay there during hard impacts. It's important.
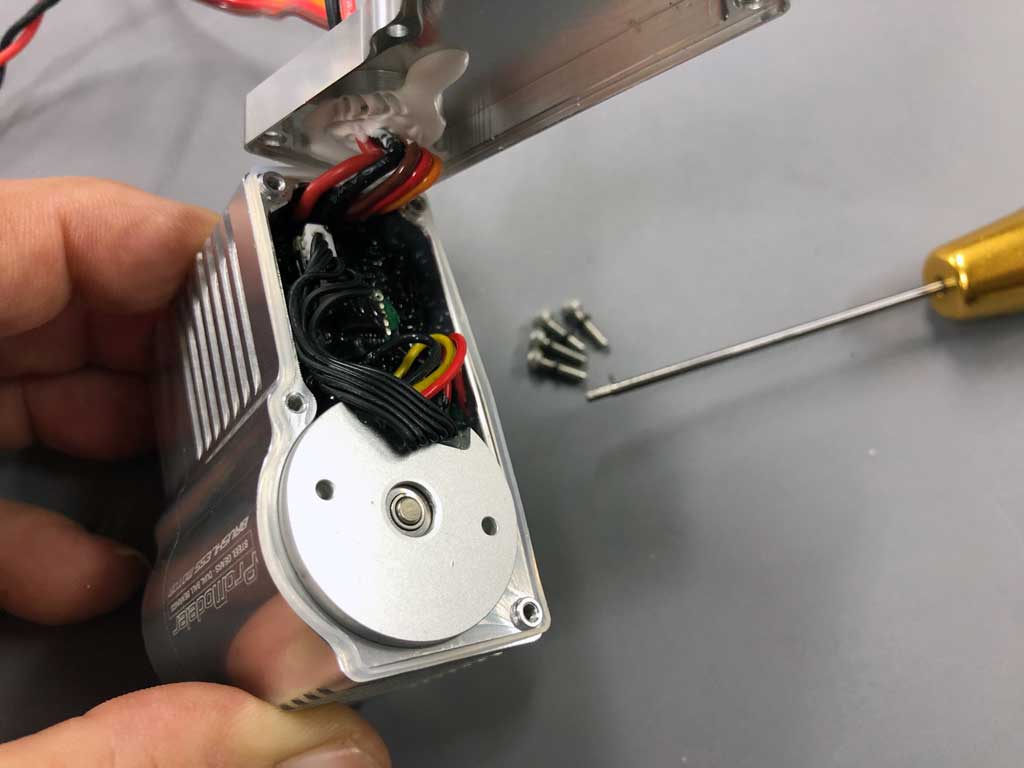
- Note how the motor is a press fit to the case promoting heat transfer
This brings us to one basic problem. This class of servo draws too much current for a receiver's lands. So we split the power between that which the receiver 'can' supply, which then powers the control circuit side of things, plus a dedicated pack expressly for the power-circuit side of the equation. Why?
Simple, if you review the specifications you'll see this servo can draw
well over 10 amps, or significantly more than the receiver can handle without going poop and releasing the magic smoke. So splitting the power allows you the liberty of running a high current device with a receiver designed for low current in mind (remember, receiver design is basically unchanged for 50 years and designed with servos consuming 1-2 amps total. So why not use direct power the way label engineered offshore servos come so you can just connect it to a 3S or 4S pack being used for propulsion? The reason is then you'd get variable torque. You see, as the propulsion motors draws down voltage (when you use the throttle), because the voltage dips then the servo's torque dips also meaning instead of 1885 you may only get 1000oz-in.
So this is what happens with Asian servos imported for hobby dealers solving the problem of customer's BECs being insufficiently powerful. Sure, it solves that problem but then it creates another one, variable torque. Worse, it's not consistent, your servo may output 1000oz, 1300, 1885, then back to 1400, but one thing is certain, it's not steady (meaning torque you can depend on).
Anyway, to see what's best practice, don't look at what goofballs on the internet do, take a gander instead at what the competitive drivers do. And one thing is certain, you'll 'never' see them sacrificing the power they paid for with a high quality servo by stealing juice from propulsion to feed the servo - never! Anyway, what works for rookies and inexperienced drivers (and those who will never be good enough to tell the difference) just won't do for good drivers. This is why we guide you to using a dedicated pack. Bottom line? It's not what you know that's the problem, but what you know that just ain't so!
Anyway, we offer two packs, an 850mAH and a 2500mAH with the small one being good for maybe two runs of 45min each and the larger one being good for a half dozen runs. If you're racing, the smaller one is perfect, if you're bashing all day, then the larger one is the no brainer. Where do you mount it?
Simple, use 3M Dual-Loc and mount it flat between the front shock towers. Add a zip tie if you're jumping, otherwise it's fine as it.
Do details matter?
In part, it's down to the details, which makes ProModeler servos so appealing versus servos produced by competitors. It's said God is in the details and one thing is certain, unlike hobby-grade servos, ours are built to meet military standards (and subjected to these tests).
MIL-STD-810G-Part 16
- Shock - Test Method 516.6
- Vibration - Test Method 514.6
- Rain - Test Method 514.5
Why bother when nobody else does? It's due to the requirements of our primary customer. However, because we're modelers and have knocked a servo off a workbench, experienced crashes, and know a thing or two about engine vibration (plus how a summer afternoon pop-up rain shower may drench a model before landing), it means these tests are important for civilian users as well. It's why we built the DS1885BLDP to meet them as well despite not having a military application at this time.
Speaking of details, there are 13 o-ring seals for this servo. While the words waterproof will never cross our lips, it's safe to say this servo is quite water resistant. And considering competitors fit theirs with 2-3 o-rings versus the 13 we use, then your takeaway should be we go the extra mile to ensure it survives the kind of abuse meted out in the real world. Being well sealed is an important ownership consideration, agreed?
- Sourced from a Rolex stem supplier, note the tiny o-ring beneath the bolt head
So you've now got a pretty good idea of how it's built. Let's next turn to details regarding how to install it within an X-MAXX . . . it's not too difficult.
Installation - Traxxas X-Maxx
Installation isn't especially difficult - but - timid modelers need not apply because they will lack the huevos to take it on, anyway. So this is not a servo for the meek, capice?
Basically, you're going to butcher the X-maxx servo mount area to make clearance for the belly. No, it's not an especially tricky job - not by any stretch. So we're thinking a few pictures will suffice.
Heads up, this sequence of 6-photos constitute all the instructions you're gonna get! If you need more hand-holding than this, sorry. We'll begin with what you need, a Dremel tool and a RototZip carbide cutting bit with 1/8" shank.
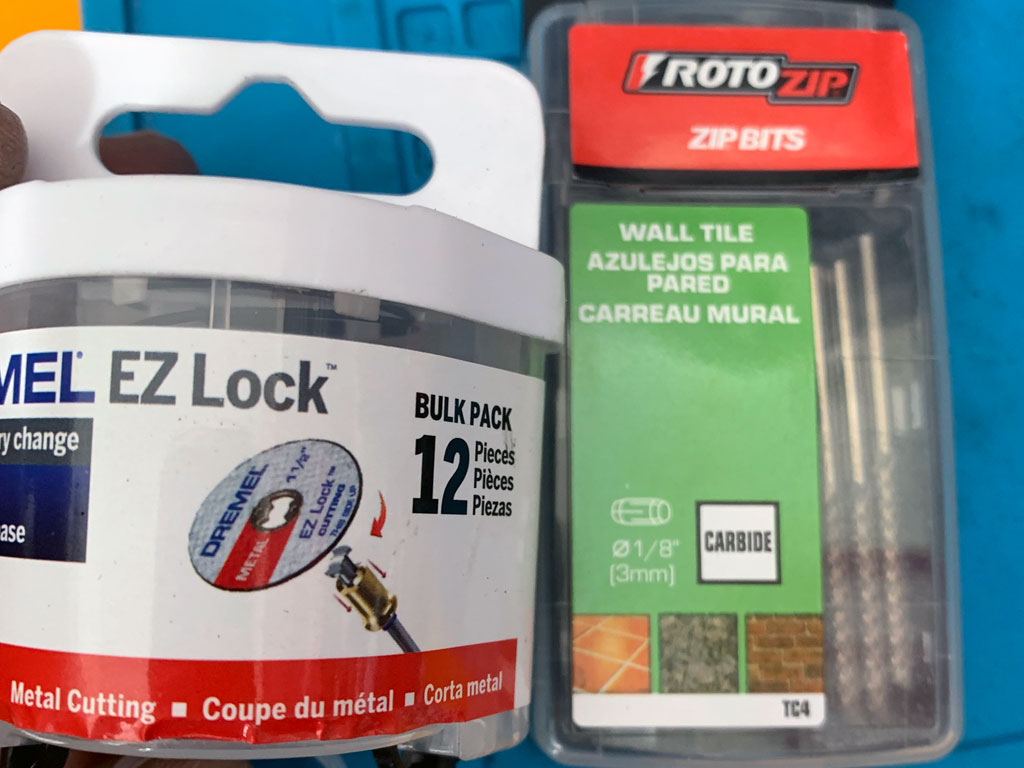
- Break out a Dremel with a RotoZip tile cutting bit on low - wear eye protection!
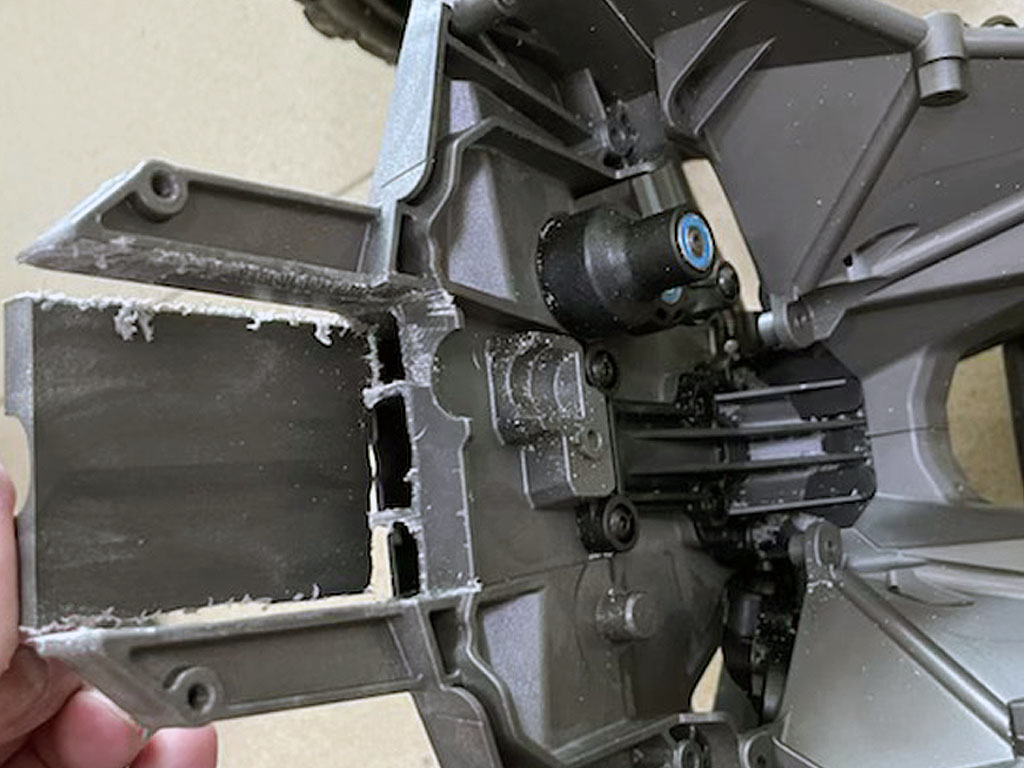
- The tool path is easy and obvious, go slow and wear eye protection!
- Here's the other side, do we really need to draw you a picture?
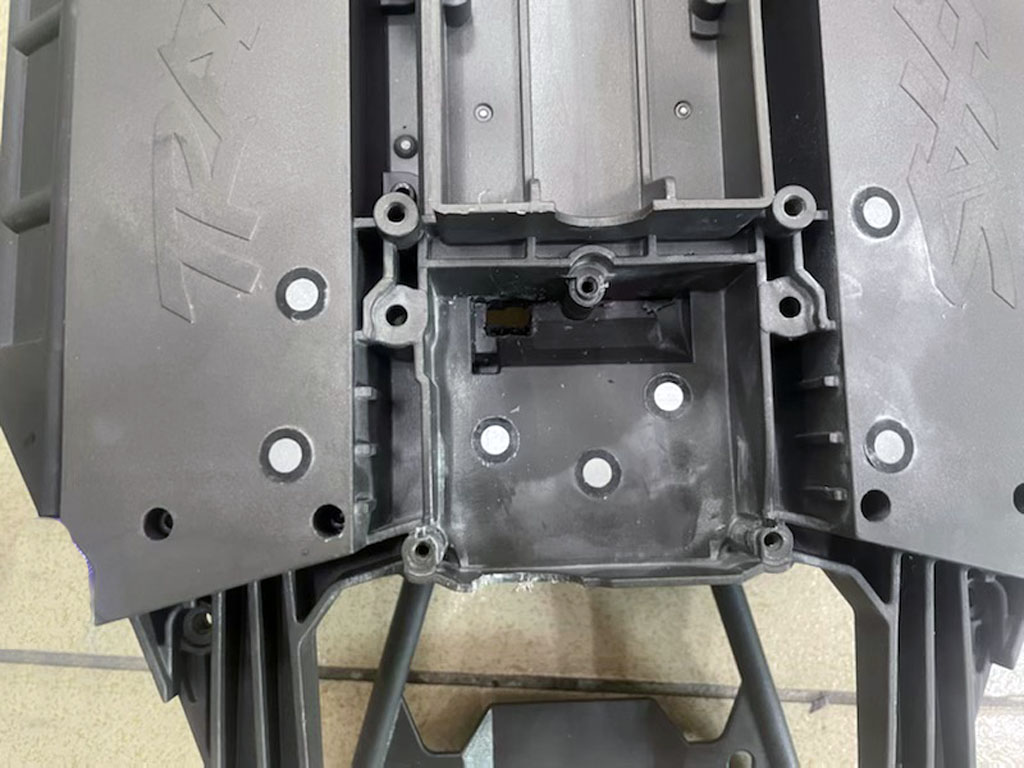
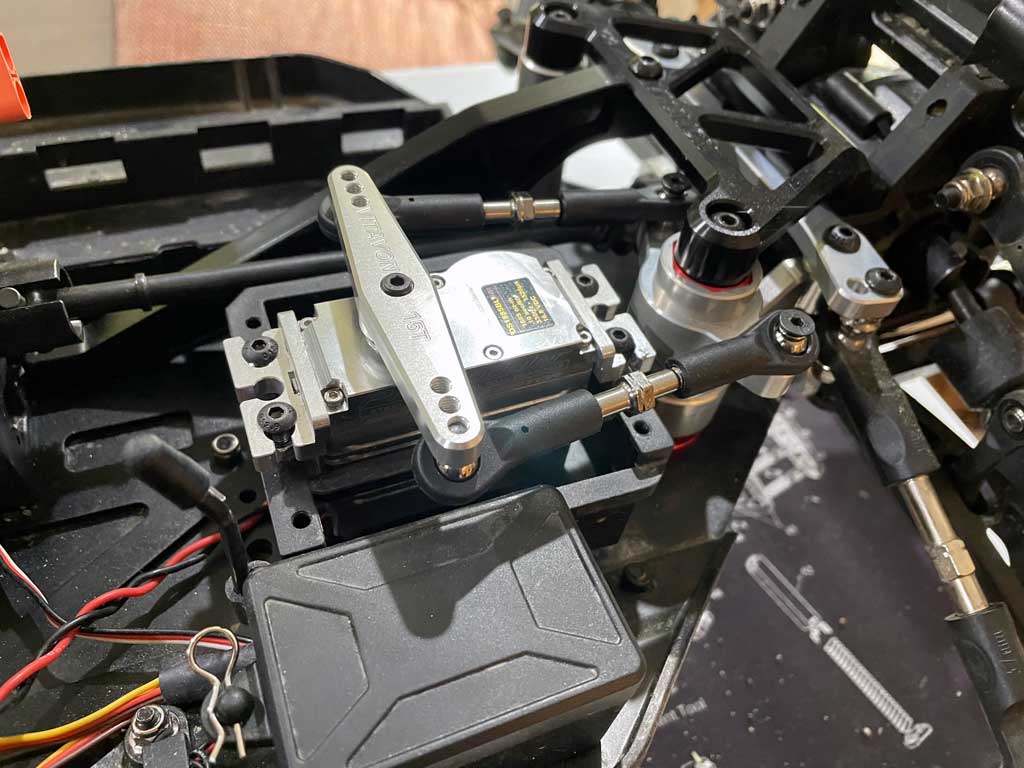
- Set into place, looking good, eh?
- Like the engine in an F1 car, the servo functions as a structural member.
Installation - Losi DBXL-E 2.0
Installation into this Losi DBXL 2.0 is a doodle. Basically you're going to shim it 5mm higher and replace the stock arm with one of ours along with a pack of adjustable links to compensate for the slight difference in output shaft position. That's it, easy peasy!
So the first step is to survey what you have, often a Spektrum SPMS906 steering servo.
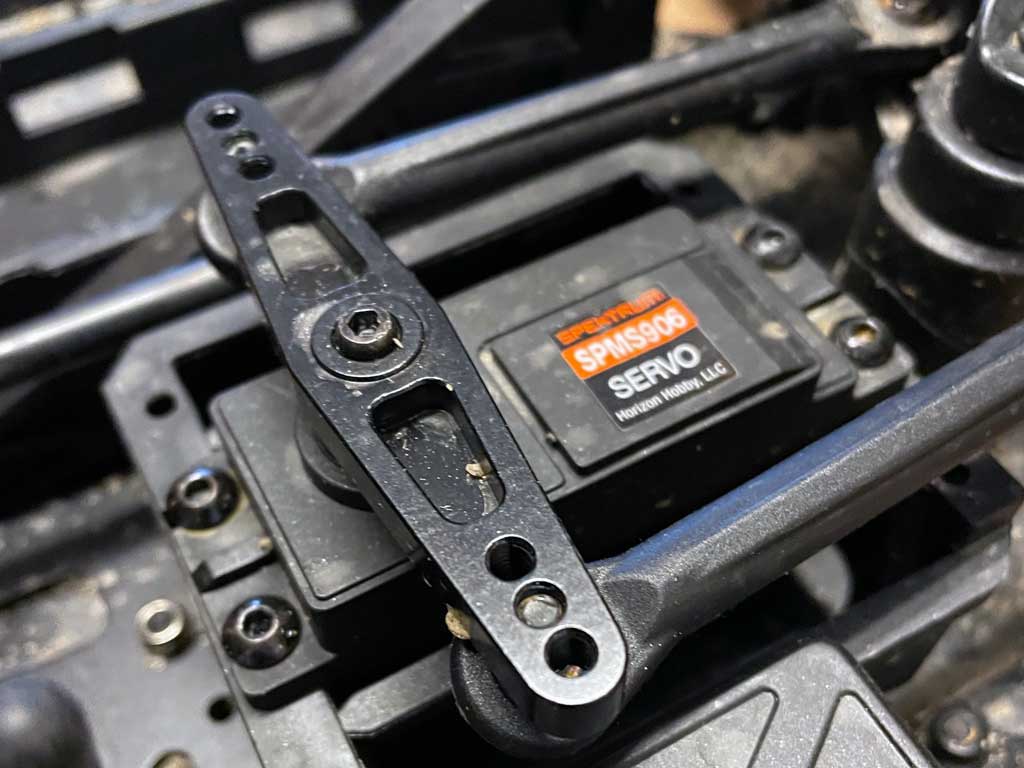
- The stocker is a Spektrum servo, not bad per se but no pork belly, that's for sure!
Step two is removing the stock servo, which is so easy we won't tell you how. Please excuse the dirt!
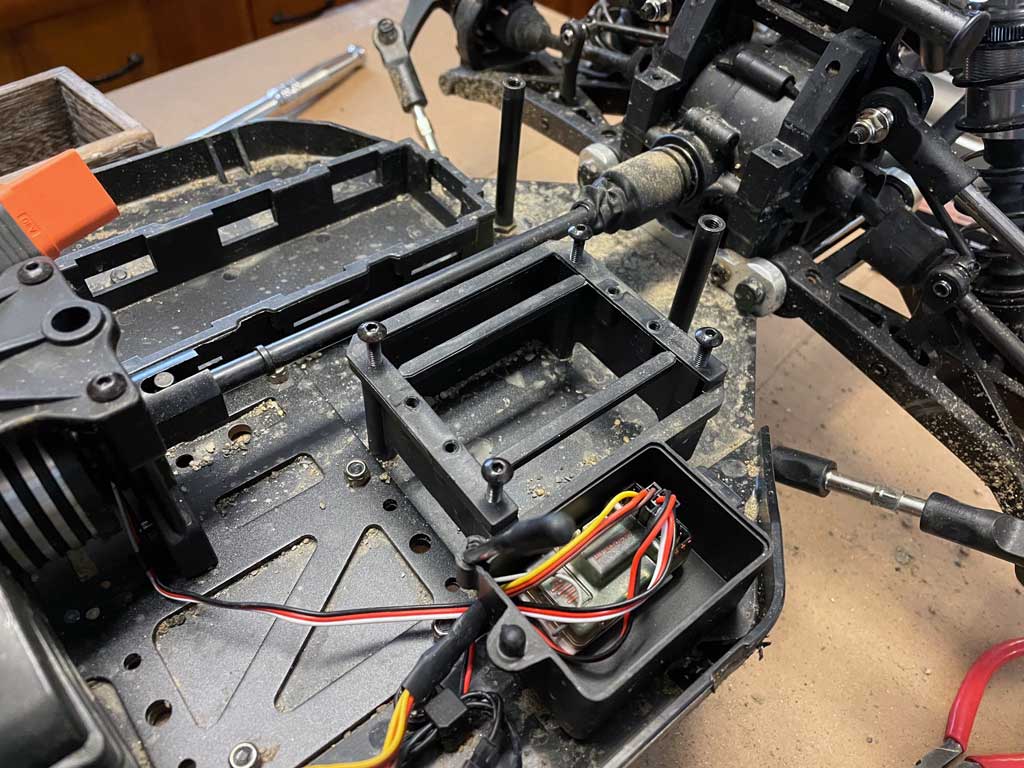
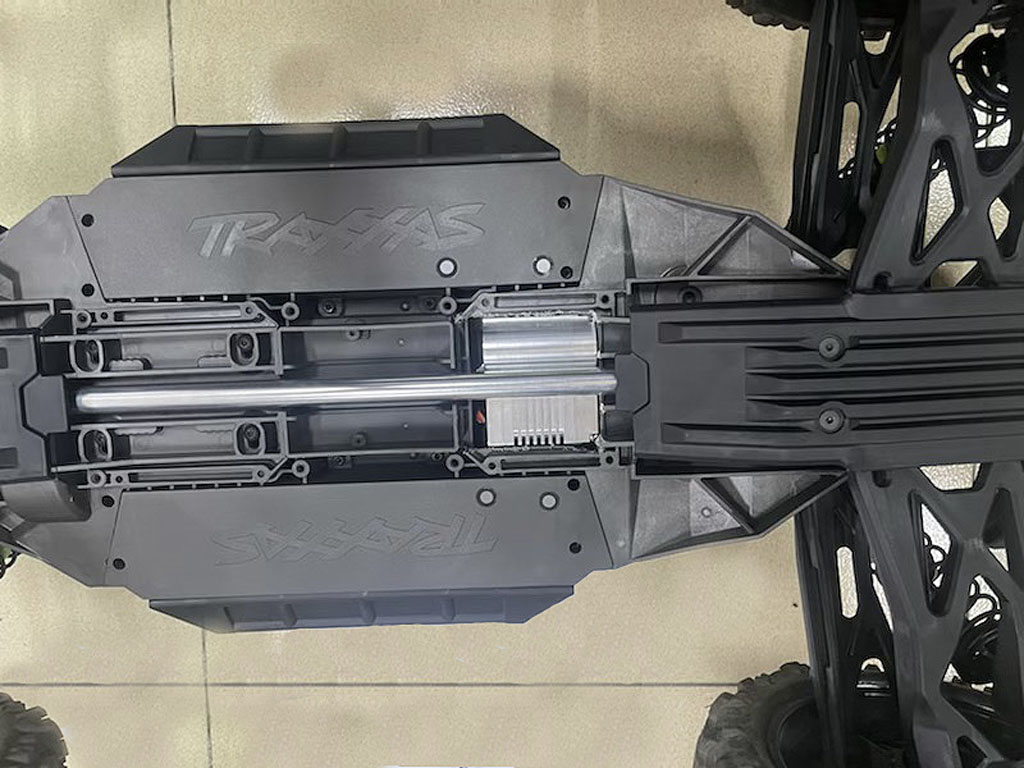
- Look at the size of the installation bay - it's ginormous.
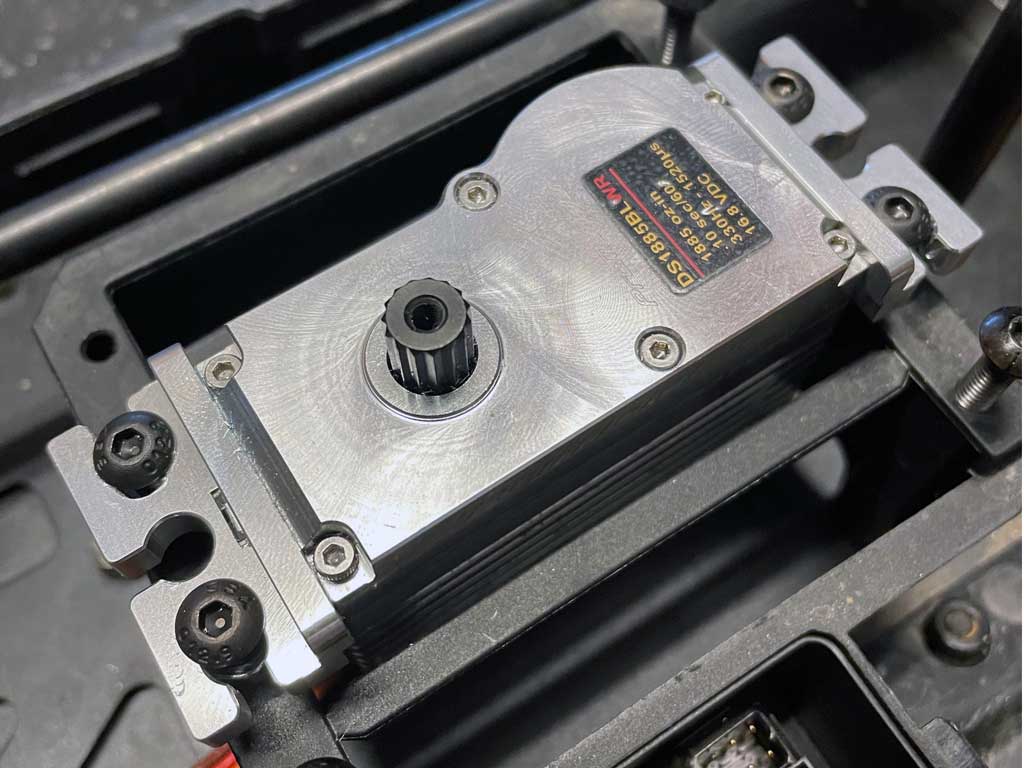
So next you're going to fix the beam mounts to the servo. A small drop of threadlocker is all that's called for, word to the wise.
- One the beam mounts are installed we're almost there.
All that's left is to shim the servo. Some 5mm thick shims will do the trick (hardware store item)
- Looking pretty good sitting there, eh? The Losi DBXL-E 2.0 is very generous in terms of space with which to work.
So we're almost done. All you need is a set of dual-linkages to replaced the fixed length plastic pushrods with ones you can adjust.

- While there are tons of available linkage kits, Losi's LOI351014 work just fine
So the last step is to install the linkage rods onto a servo arm and a PDRS40D-15T will do nicely.
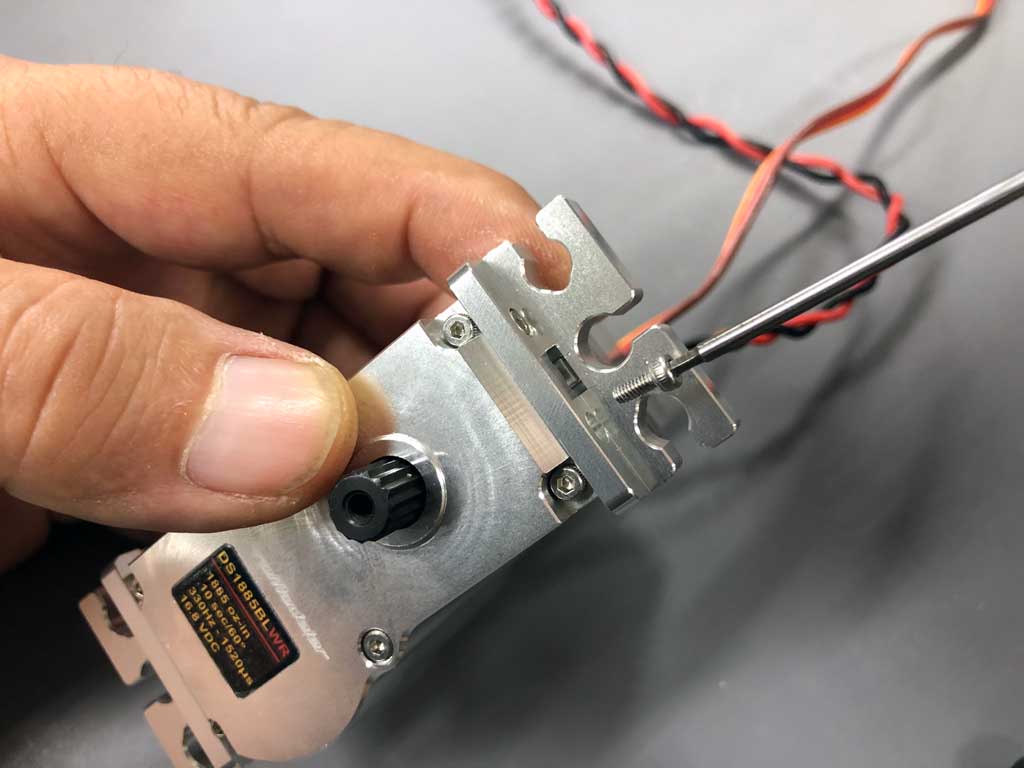
 - Subtrim the servo center, and set the end points and you're done!
What you get
While installation is as easy and what you get depends on whether it's for an X-Maxx or something else. Use the pull-down box to select for the XX-combo, which includes the servo (natch), plus the servo horn - or - in the alternative, the beam mounting kit if it's not going into an X-Maxx. Feast your peepers on this sweetheart!
- Along with the DS1885BLDP midi-class servo, an included accessory for installation in an X-MAXX is a special steering horn!
And if the X-MAXX isn't where you want to install this servo, then an alternative option you'll want instead is the beam mounting kit. This equips the XX servo with mounting beams dimensioned like those of the DS2685BLHV and other 1/5th scale servos. This is so you can either fit this servo to a 1/5th scale rig, or into a giant scale model aircraft!
- A pair of stainless M2 machine thread bolts secure the beam to the servo - use a dab of thread locker!